How to Upload Video to YouTube: 2026 Guide
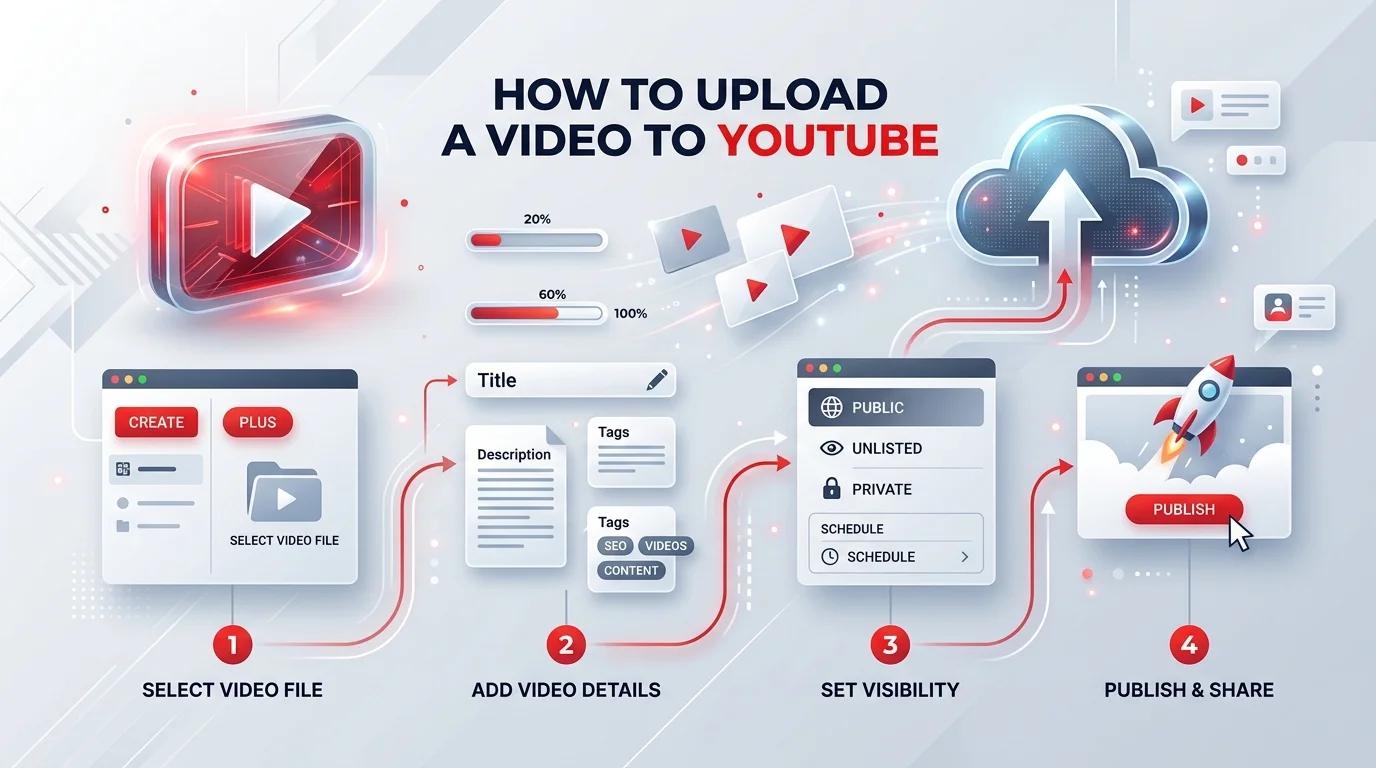
To upload video to YouTube, sign in to YouTube Studio, click Create → Upload videos, select your file, fill in your title/description/thumbnail, choose your visibility setting, and hit Publish. Verified accounts can upload files up to 256GB or 12 hours long, and up to 15 videos at once.
That's the short version. Now let me walk you through it properly — because the details in between are what actually get your video seen.
I still remember my first YouTube upload.
I clicked every wrong button. I skipped the thumbnail. I forgot the description entirely.
And the video? It got 12 views.
That was years ago — and today, I'm going to walk you through the exact process I now use every single time I hit publish. No fluff. No guesswork. Just a clear, step-by-step system that works in 2026.
Quick Facts: YouTube Upload Limits (2026)
Here's the data you actually need, pulled straight from Google's official upload documentation:
Spec | Limit |
|---|---|
Max file size (verified account) | 256 GB |
Max video length (verified account) | 12 hours |
Max video length (unverified account) | 15 minutes |
Videos per batch upload | 15 |
Title character limit | 100 characters |
Description character limit | ~5,000 characters |
Supported formats | MP4, MOV, AVI, WMV, and others |
Bookmark this table. You'll reference it more than you think.
Why Uploading The Right Way Actually Matters
Here's the thing most beginners get wrong: they think uploading a video is just "click, upload, done."
It's not.
Every field you fill out during the upload process — your video title, your video description, your custom thumbnail — sends signals to YouTube's algorithm. And that algorithm decides who sees your video next.
So when you treat the upload process like a checkbox exercise, you're leaving views on the table. When you treat it like a strategy, you start showing up in YouTube search and suggested feeds.
That's the difference between a video that flops and one that compounds. If you're serious about this long-term, it's worth also thinking about how to become a YouTuber the right way from day one — uploading is just one piece of that bigger picture.
Step 1: Sign In To YouTube Studio
First things first — you need a home base.
Getting Into Your Dashboard
Head over to studio.youtube.com and sign in with your Google account. If you've got Gmail, you already have what you need.
This is your content dashboard. It's where every upload, every analytics report, and every setting lives.
Honestly? Bookmark this page. You'll be living here.
Step 2: Click Create, Then Upload Videos
Once you're in, look at the top-right corner.
You'll see a button labeled Create. Click it, then select Upload videos.
Choosing Your File
From here, you can either drag your file straight into the window, or click to browse your computer. As shown in the table above, you can upload up to 15 videos in a single batch — which is huge if you're a creator who batches content.
Quick tip: make sure your file is in a supported format like MP4. It'll save you a headache later.
Step 3: Fill Out The Details (This Is Where The Magic Happens)
Okay, this is the part everyone rushes through. Don't.
While your video processes in the background, YouTube gives you a Details screen. This is your chance to optimize.
Your Video Title
Keep it under 100 characters — that's a hard limit, not a suggestion. Lead with your main keyword. Make it curiosity-driven, but never clickbait — YouTube (and your audience) will punish you for that.
Your Video Description
Your first two lines matter more than the rest combined. Why? Because they show up in search results before anyone clicks "show more."
Front-load your primary keyword, then follow with a natural explanation of what the viewer's about to watch. Add timestamps, chapter markers, and any relevant links below that.
Your Thumbnail
I can't stress this enough — your custom thumbnail is doing more heavy lifting than almost anything else in this process.
A bold image, high contrast, 3-5 words max. That's the formula. It's the difference between a scroll-past and a click-through.
Step 4: Add Video Elements
Next screen: Video elements.
This is where you add end screens and cards — little interactive elements that point viewers toward another video, a playlist, or a subscribe button.
Don't skip this. It's basically free extra watch time sitting right there, waiting for you to claim it.
Step 5: Run Through The Checks
YouTube will now run an automated scan.
It checks for copyright claims and Content ID matches — any restrictions that might apply to your video. If you've used licensed music or someone else's footage, this is where it'll flag you.
Good news? If your content is original, this step usually takes seconds.
Step 6: Choose Your Visibility Settings
Now for the big decision.
Public vs. Unlisted vs. Private
Setting | Who Can See It | Best For |
|---|---|---|
Public | Anyone on YouTube | Growing a channel, SEO, discoverability |
Unlisted | Only people with the direct link | Client previews, private sharing |
Private | Only you (and invited users) | Drafts, personal storage |
If you're serious about growing a channel, Public is almost always the answer. Views don't happen in private.
You can also schedule your video to go live at a specific time. According to data cited by ytshark.com's 2026 upload guide, the window between 3–6 PM viewer local time tends to perform best, catching people during after-work browsing — with Sunday showing especially high engagement.
Step 7: Hit Publish
Deep breath. Click Publish.
That's it. Your video is live.
YouTube will send you an email once processing wraps up — higher resolutions like 4K just take a little longer to render out than SD or HD.
A Few Mistakes I See Beginners Make Constantly
Let me save you some pain here.
Uploading without a thumbnail strategy — this alone tanks your CTR
Ignoring tags — they still help YouTube categorize your content
Ignoring playlists — grouping related videos boosts session watch time
Publishing inconsistently — the algorithm rewards creators who show up regularly
Forgetting to verify your account — unverified accounts are capped at 15-minute uploads
Small fixes. Big impact.
Mobile Upload: The Quick Version
Don't have your laptop handy? No problem.
Open the YouTube app, tap the + button at the bottom, and select Upload a video. The same fields apply — title, description, thumbnail, visibility.
It's genuinely just as powerful as the desktop version. I've published entire videos from my phone in an airport terminal. True story. If you're recording on an iPhone and the file feels too large to move around, it's worth knowing how to send long videos on iPhone before you even get to the upload screen.
Frequently Asked Questions
Can I upload a video to YouTube from my phone?
Yes. Open the YouTube app, tap the + icon, select Upload a video, and fill in the same title/description/visibility fields as the desktop version.
What's the maximum file size I can upload to YouTube?
Verified accounts can upload files up to 256 GB or 12 hours long, whichever comes first. Unverified accounts are capped at 15-minute videos.
How long does YouTube take to process a video?
Processing time depends on resolution and length. 4K and HD videos take noticeably longer than SD, so budget extra time before a scheduled publish.
Should I make my video Public, Unlisted, or Private?
Public if you want views and discoverability. Unlisted for sharing with a specific group without search visibility. Private for drafts only you should see.
Can I upload more than one video at a time?
Yes — YouTube allows up to 15 videos per batch upload through YouTube Studio.
Does YouTube check for copyrighted content automatically?
Yes. Every upload passes through YouTube's Content ID system during the Checks step, which flags matched copyrighted audio or footage.
So, Should You Actually Do This?
Look — if you've got knowledge, a story, a product, or a skill worth sharing, there's no better free distribution engine than YouTube.
It's the second-largest search engine on the planet. Every video you upload becomes a permanent, searchable asset that works for you long after you hit publish.
You don't need fancy equipment. You don't need a huge team. You need a plan — and now, you've got one.
So open YouTube Studio, follow these steps, and get your first (or fiftieth) video live.